Special considerations
This page covers: Programs, Delete a Draft RFx
Programs
Programs are document storage repositories for commonly used generic documents or for grouping a suite of Sourcing Projects under a single umbrella. You can set up and link programs to your opportunities by selecting the appropriate program from the Programs drop-down list. Documents available under a program will be accessible to the sourcing team members to upload for external view. You can track opportunities linked to a program and view the status of those opportunities. Within a program, you can create a team to manage the documents for a wider group and use the discussion forum to communicate with program team members.
Click to enlarge image
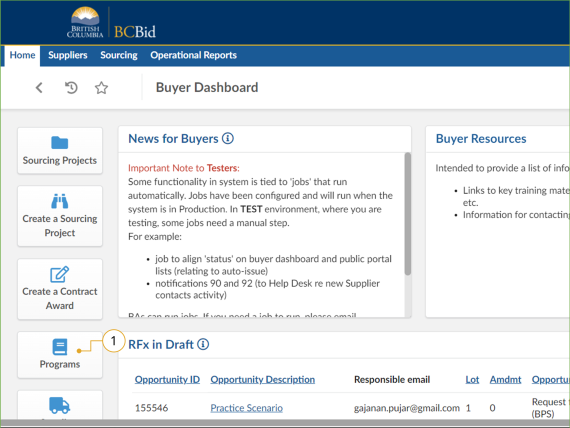
1. In the quick access menu, click Programs.
Creating Programs
Click to enlarge image
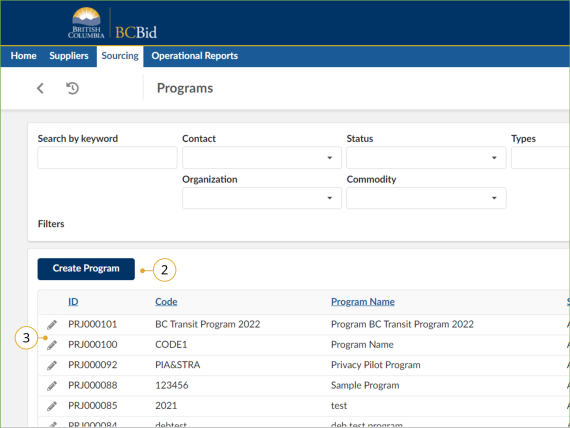
2. Click Create Program.
3. Optional: You can edit Programs by clicking the pencil icon beside the appropriate Program ID.
Click to enlarge image
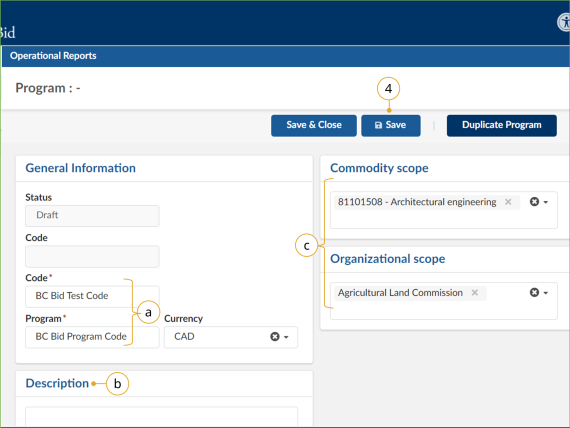
4. Complete the General Information form and click Save.
a. Enter a Code and Program.
b. Optional: Enter a description of the program.
c. Select an Organizational scope and Commodity scope from the drop-down lists to differentiate between programs and make them easy to find.
Note: BPS entities can run opportunities and request bids in USD because the evaluation and pricing information are not captured in the BC Bid application. They will have to convert to CAD when they post the Contract award notice.
To duplicate an existing program, click Duplicate Program.
![]() Code is a unique identifier for the Program. Users should enter a label name specific to their organization in the Program’s Code text box. To limit a Program to an organization, select that organization in the Organizational scope drop-down list. The only Currency available is CAD.
Code is a unique identifier for the Program. Users should enter a label name specific to their organization in the Program’s Code text box. To limit a Program to an organization, select that organization in the Organizational scope drop-down list. The only Currency available is CAD.
Program Documents
Click to enlarge image
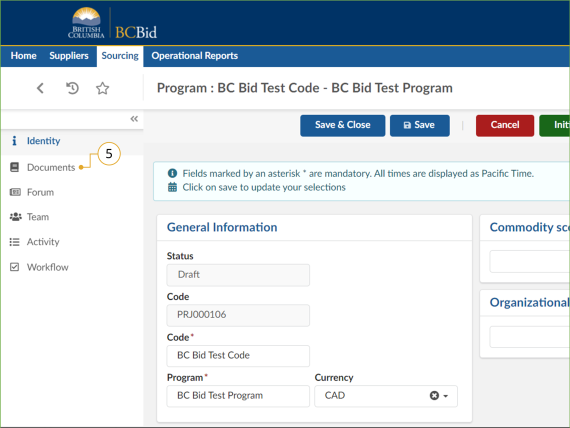
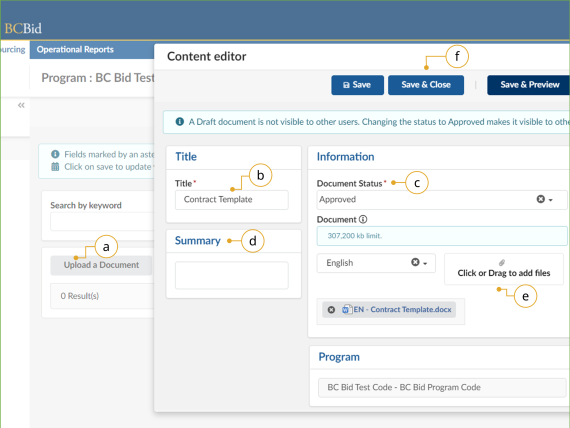
5. To attach the relevant documents, click the Documents menu.
Click to enlarge image
a. Click Upload a Document.
b. Enter a Title.
c. Change Document Status to Approved if you are ready to make it accessible to the program.
d. Optional: Enter a Summary.
e. To upload files, click Click or Drag to add files or drag and drop files on top of the button.
f. Click Save & Close.
Program Messaging
Click to enlarge image
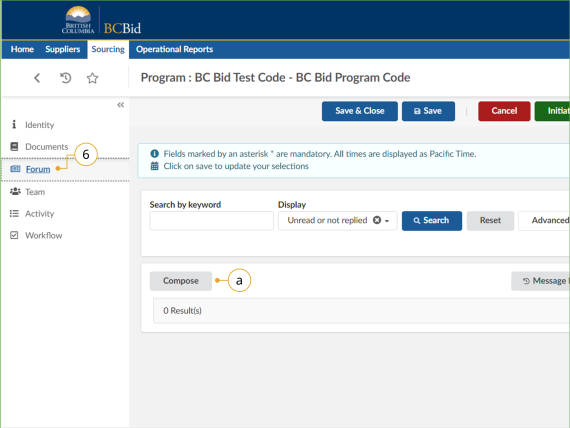
6. Optional: Use the Forum menu to communicate with members added to the program.
a. Click Compose.
Click to enlarge image
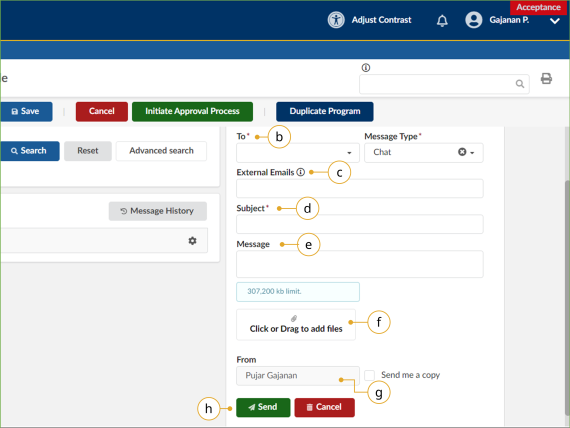
b. Use the To drop-down list to select one or multiple recipients.
c. Optional: In the External Emails text box, insert the email address of one or multiple external recipients.
d. Enter a Subject.
e. Optional: Enter a Message.
f. Add attachments to your message by clicking Click or Drag to add files or directly dragging and dropping a file onto the button.
g. To receive a copy of the message, click Send me a copy.
h. To send the message, click Send.
Note: You cannot delete sent messages.
![]() Files that are attached to BC Bid messages are only available within the BC Bid application and will not appear in the external email notification.
Files that are attached to BC Bid messages are only available within the BC Bid application and will not appear in the external email notification.
Program Team Members
Click to enlarge image
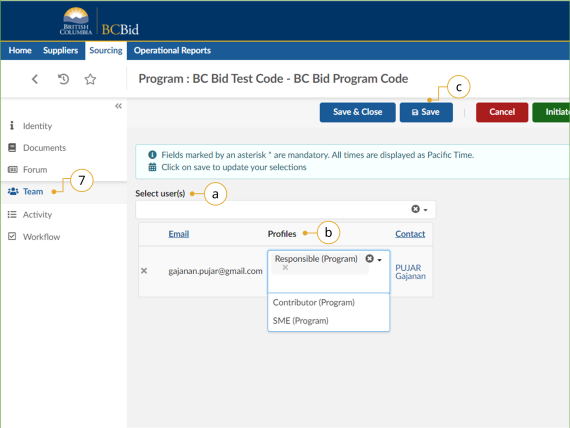
7. Optional: Use the Team menu to add members to the program.
a. In the Select user(s) drop-down list, enter a user name.
b. Using the Profiles column drop-down list, select a profile for the user.
c. Click Save.
Click to enlarge image
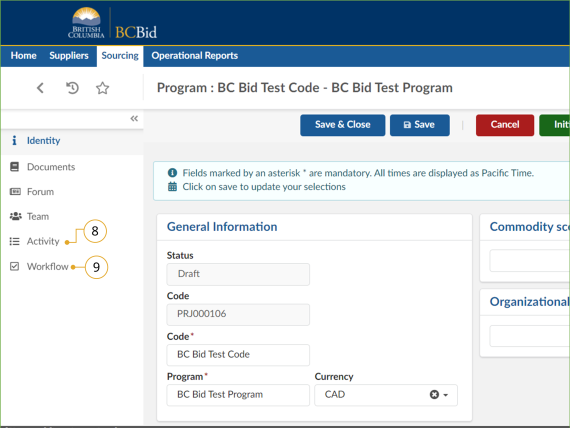
8. Optional: Use the Activity menu to track opportunities linked to the program.
9. Optional: Click the Workflow menu to see the actual workflow.
Program Approvals
Click to enlarge image
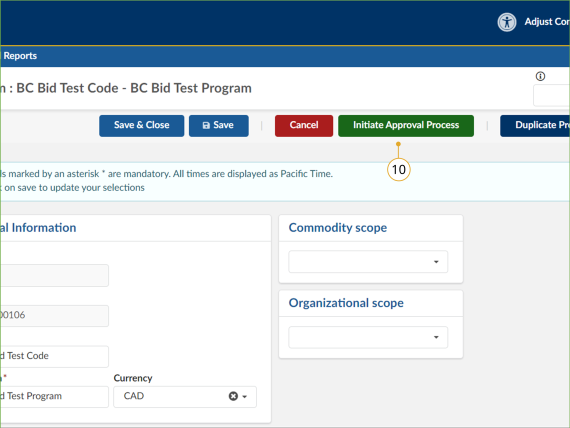
10. Click Initiate Approval Process to start the workflow.
Note: After clicking Initiate Approval Process, the Status of the Program will change to “Approval in progress”. To update the Status to “Approved”, click Approve. Only Approved programs can be linked to an opportunity. Then click Save & Close.
Close a Program
Click to enlarge image
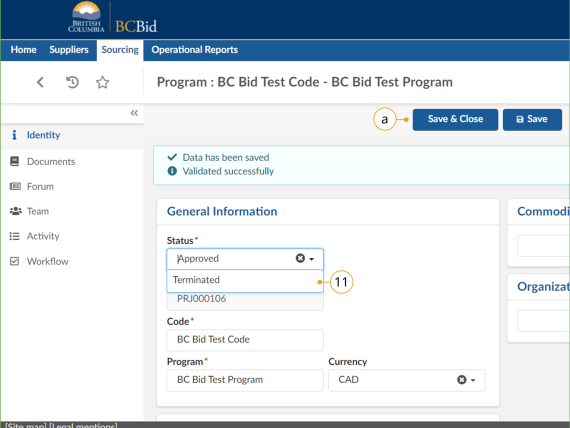
11. Optional: To change the status of a program from ‘Approved’ to ‘Terminated’, select Terminated from the Status drop-down.
a. Click Save & Close.
Note: This removes the program from being connected to future sourcing projects and can be done either by the user responsible for the program or an Administrator.
Delete a Draft Opportunity (RFx)
View Supplier Email History
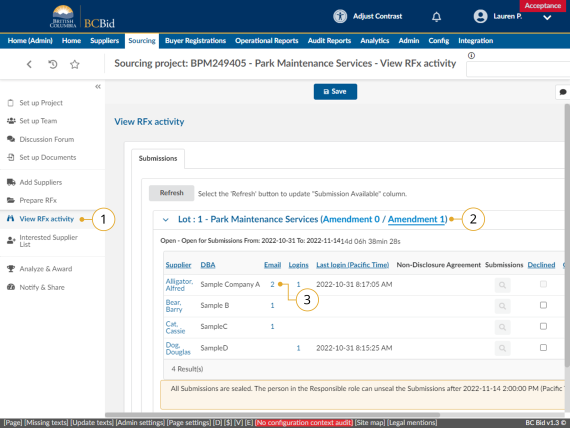
Buyers can view the emails sent from BC Bid to a supplier. Suppliers may receive a different number of notifications from one another depending on when they click Start Submissions or other notifications they receive such as e-Bidding confirmation.
1. Click on View RFx Activity.
2. Choose amendment version to view.
3. Click on the number in the Email column.
Note: Suppliers may have received a different number of email depending on when they clicked the Start Submission button.
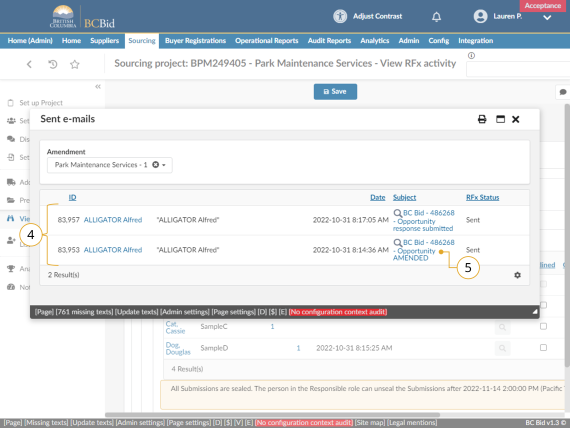
4. In the Sent emails dialog box, view a listing of the emails sent to the selected supplier.
5. Click on the subject to view the email.
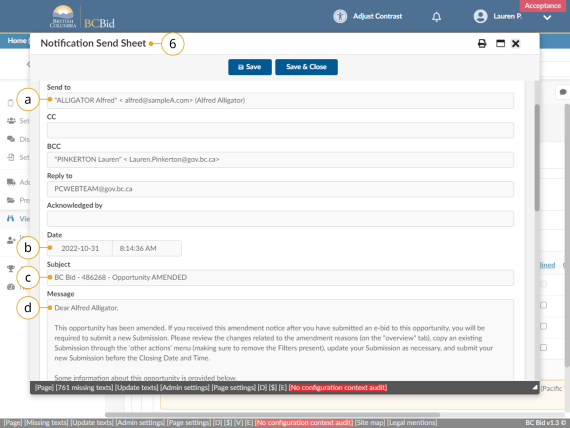
6. In the Notification Send Sheet dialog box to view the desired information.
a. Send to – the email address the notification was sent to.
b. Date – the date and time the email was sent.
c. Subject – the subject line of the email.
d. Message content – content of the message.
Subscribe
Enter your email address to subscribe to updates of this page.

