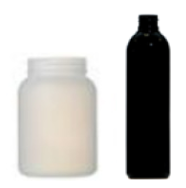
Lake monitoring bottle guide
Below is a visual guide about what your lake monitoring sampling bottle kit should include and how they should be used.
Note: dependent on our supplier, the 250ml bottle may not be the exact shape.
| Order / Sample ID | Bottles | Location | Instructions |
|---|---|---|---|
|
1 REG @ 0.5 m |
 |
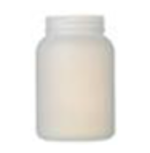
Taken 0.5 m from surface | Lower the water collection device to the depth of 0.5 m and drop the weight to close the ends. Retrieve the water sampler and fill, seal, and label each of the bottles in the photo to the left. |
|
2 REP @ 0.5 m |
 |
Taken 0.5 m from surface |
Repeat step 1 above or use the remaining water in the water collection device (after filling the regular bottle) to fill your replicate sample. Only one replicate sample is required per lake for each sampling visit. |
|
3 BLF (Blank Sample) |
 |
Not applicable | Fill, seal, and label the 250 ml plastic bottle in the photo to the left using DI water while still on the boat. |
|
4 REG @ mid-depth |
 |
Taken mid-depth | Lower the water collection device to the mid-level depth for your site and drop the weight to close the ends. Retrieve the water sampler and fill, seal and label the bottles in the image to the left. |
|
5 REG @ bottom |
 |
Taken 1 m above bottom |
Lower the water collection device to the bottom depth and drop the weight to close the ends. The bottom depth is defined as being either 1 m above the measured lake bottom at sites 50 m or less in depth, or 50 m at sites greater than 50 m in depth. Retrieve the water sampler and fill, seal and label the bottles in the image to the left. |
| REG = Regular sample. REP = Replicate sample. BLF = Blank sample |
For each regular sample, record any water odour or colour observations on the field sheet.
- Odour: smell water in sampler for odour. Example descriptors: nil (no odour), organic, sulphur (rotten eggs), metallic, etc.
- Water colour: observe water colour in sampler preferably against a white backdrop. Example descriptors: clear, green, brown, cloudy, etc.
Download the bottle guide (PDF)
Contact information
If you have more questions about the bottle guide:
