Level 3 study field procedures
A step by step field procedures guide for Level 3 study lake monitoring volunteers.
Reminder
Please hold off going out if it is raining heavily (i.e. making it difficult to see the Secchi disk accurately), if there is abnormally high boat traffic, or if your safety would be at risk. A clear, calm day would be best.
Refer to the Level 3 program overview page for useful information before and after your sampling event.
Step 1 - Getting to the site
- Upon arrival, note any safety hazards or concerns and adjust plans as needed
- It is important that the true deep station be sampled so that seasonal trends in the near bottom water quality can be determined. It is recommended to use a GPS or depth sounder
- Before anchoring, check lake depth with calibrated rope, tape or depth sounder.
- Record depth to nearest 0.01 metre or establish permanent buoy. This will allow "bottom-1 m" sample to be collected at correct depth relative to the bottom
- If dropping an anchor, allow boat to swing away from the bottom sediment disturbance caused by dropping anchor. If very calm, anchoring may not be necessary
- Record the date, time, volunteer names, weather, and water conditions (refer to Field form - digital XLSX)
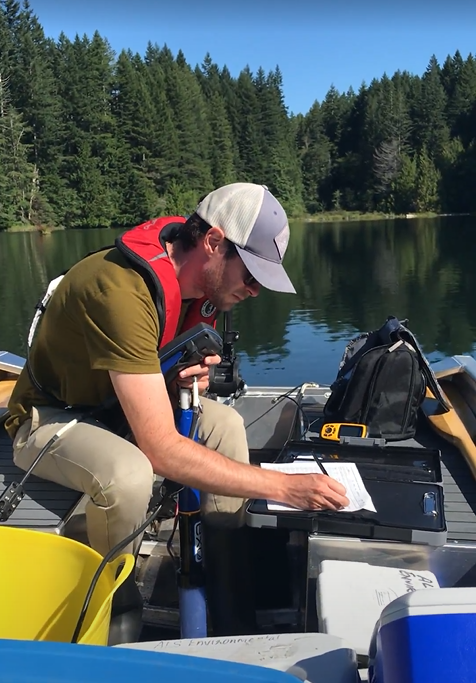
Step 2 - Lake profile
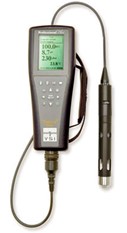
- Calibrate the YSI (Refer to “How to Calibrate my YSI ProSolo ODO Meter” for step-by-step instructions)
- To get accurate readings the meter depends on Barometric pressure, which varies daily, so the meter must be calibrated each time you sample
- Record the percentage (%) Dissolved Oxygen reading at the end of calibration in the field sheet to help us determine whether the YSI probe needs servicing
- Lower the YSI probe until the probe is submerged just below the surface. Wait at least one minute before reading your results to allow the readings stabilize. Record:
- Temperature (to the nearest 0.01°C)
- Dissolved oxygen (to the nearest 0.01 mg/L)
- Lower the probe to a depth of one metre and repeat, recording the values once they have stabilized
- Continue to measure and record temperature and dissolved oxygen values at one metre intervals
- The last measurement will be from a depth one metre above the measured lake bottom (to prevent sediments in sample) or until the probe cable has reached its maximum length.
Step 3 - Water sampling
- For water collection from any depth:
- (1) set sampler, ensuring misfire will not occur;
- (2) lower to desired depth, sway rope to exchange water in sample;
- (3) drop messenger; and
- (4) retrieve sampler
- Using valve or hose on sampler, carefully fill sample bottles allowing contents to overflow (forcing bubbles out)
- Try to avoid touching the mouth of the bottle with the sampler hose to prevent contamination
- Refer to the chart below for more detailed instructions
| Order / Sample ID | Bottles | Location | Instructions |
|---|---|---|---|
|
1 REG @ 0.5 metre |
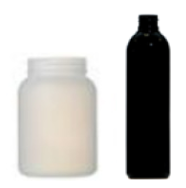 |
Taken 0.5 metre from surface | Lower the water collection device to the depth of 0.5 metre and drop the weight to close the ends. Retrieve the water sampler and fill, seal, and label each of the bottles in the photo to the left. |
|
2 REP @ 0.5 metre |
 |
Taken 0.5 metre from surface |
Repeat step 1 above or use the remaining water in the water collection device (after filling the regular bottle) to fill your replicate sample. Only one replicate sample is required per lake for each sampling visit. |
|
3 BLF (Blank Sample) |
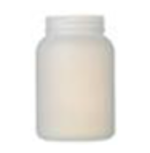 |
Not applicable | Fill, seal, and label the 250 ml plastic bottle in the photo to the left using deionized water while still on the boat. |
|
4 REG @ mid-depth |
 |
Taken mid-depth | Lower the water collection device to the mid-level depth for your site and drop the weight to close the ends. Retrieve the water sampler and fill, seal and label the bottles in the image to the left. |
|
5 REG @ bottom |
 |
Taken 1 metre above bottom |
Lower the water collection device to the bottom depth and drop the weight to close the ends. The bottom depth is defined as being either 1 metre above the measured lake bottom at sites 50 metre or less in depth, or 50 metre at sites greater than 50 metre in depth. Retrieve the water sampler and fill, seal and label the bottles in the image to the left. |
| REG = Regular sample. REP = Replicate sample. BLF = Blank sample |
For each regular sample, record any water odour or colour observations on the field sheet.
- Odour: smell water in sampler for odour
- Example descriptors: nil (no odour), organic, sulphur (rotten eggs), metallic, etc.
- Water colour: observe water colour in sampler preferably against a white backdrop
- Example descriptors: clear, green, brown, cloudy, etc.
Step 4 - Secchi depth
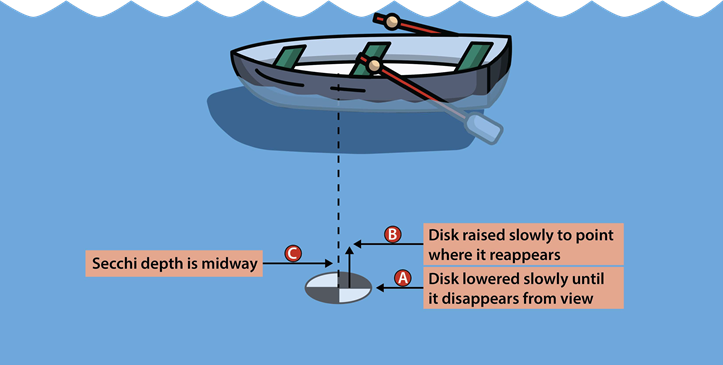
- Lower the Secchi disk over the shaded side of the boat. Avoid wearing sunglasses
- Slowly lower the disk until the black and white pattern is no longer visible
- Note the measurement on the tape measure in metres at the waters surface (estimate to the nearest 0.01m). Record this measurement as Distance A
- Pull the disk up until the black and white pattern just appears again and record the measurement on the tape measure at the waters surface as Distance B
- Average the two measurements [ (Distance A + Distance B) / 2 ] = Secchi depth
Step 5 - Check and fill in the remainder of the form
Please fill in the entire form and note any observations while travelling to or while sampling at the site. This may include:
- algal blooms
- surface slicks
- debris
- pollen
- zooplankton
- fish kills
- recent storm or high wind events
- fishing derby’s
- water skiing competitions, etc.
The data form has space for one site on the same water body. If you need more, please use a separate copy of the data form.
Step 6 - Shipping
- Ensure water samples remain cool (ideally 4°C) until ready for shipping (use ice packs provided)
- Take a photo of the completed requisition form as a back-up
- Place completed requisition form in zip loc bag and put in cooler
- Ship cooler containing bottles, ice, and requisition form to the lab within 24 hours of sampling
- The lab results can be affected by warm samples and time between collection and analysis

Step 7 - Data entry and end of season responsibilities
- Preferably, please use our Field Data Submission Tool to submit your field data after each sampling event
- Make sure to attach photos of the completed lab requisition and any field observations
- Finally, please return sampling equipment to the Ministry for maintenance and storage within 30 days of final sampling event for the season, unless otherwise arranged. A Purolator account number will be provided. Please send it to:
Ministry of Environment and Climate Change Strategy
Attn: BC Lakes Stewardship and Monitoring Program
1011-4th Ave, Suite 325
Prince George, BC V2L 3H9
T: (250) 649-2939
If you need assistance with any of the above steps, please contact us.
Need a copy of this page? Download a PDF version of the Level 3 study field procedures.
Field procedures:
- Level 1 study
- Level 2 study
- Level 3 study
- Field Data Submission Tool
Level 3 study forms and documents
For current lake monitoring volunteers, send us your completed field data.
Contact information
Contact the Aquatic Stewardship Coordinator if you have any questions regarding the level study field procedures.
