Soil sampling methods and tools
Before any sampling can begin, the following steps should be considered to ensure the sample is collected and analyzed correctly:
- Obtain appropriate tools for field sampling
- Divide fields and production areas into sampling zones
- Determine sampling locations based on crop
Obtaining appropriate tools for field sampling
Probes used for soil sampling are designed to collect a uniform amount of soil at any given depth. Push probes, hammer probes, and bucket augers (Figure 1) are commonly used because they are capable of taking uniform samples with depth.
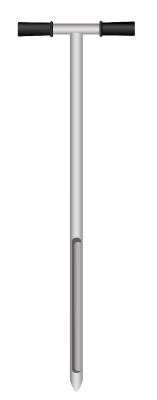
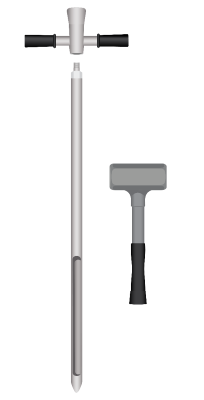
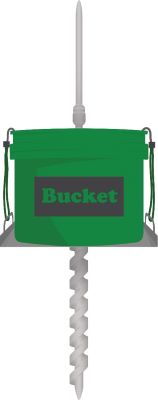
Figure 1. Examples of soil sampling equipment: a soil push probe, hammer probe, and bucket auger.
Along with a probe, a clean plastic bucket should be used. Ensure that the bucket and free of any debris and has not been used to collect or hold fertilizer, manure, or compost. Avoid using a metal bucket as it can interfere with test results.
Dividing fields and production areas into sampling zones
Fields and production areas should be divided or grouped into sampling zones that have the same soils, cropping systems, and management. Each sampling zone should be sampled independently to create a composite soil sample that will be representative of the entire sampling zone.
Identify areas with differences in topography, nutrient application rates, soil type or texture, or soil tillage practices to create sampling zones with uniform characteristics. A sampling zone is typically an entire field or production area, but differences in soil may require an area with the same crop and management to be split into different sampling zones. Some areas may be separated by a physical barrier, such as a ditch or road, or even be non-contiguous, but may be considered one sampling zone if they have uniform characteristics.
Sampling zones for the basic soil fertility test should be limited to a 10-hectare (25-acre) size. Sampling zones measuring nitrate are not limited to a size when no other differences in soils, cropping system, or management exist. In situations where large areas need to be sampled, alternative sampling strategies, such as directed benchmark sampling, may be used.
Assign a unique identifier to each sampling zone, such as a name or number, to keep track of each year’s sampling areas. By keeping a record of sampling zones and previous results, soil nutrient management practices can be compared from year to year.
Determine sampling locations based on crop
The sampling location within the sampling zone is dependent on the crop and method in which nutrients area applied. For all crops not mentioned specifically, use the ‘General’ sampling guideline. If soil sampling for the basic soil fertility test as well as for the post-harvest nitrate test at the same time, ensure samples from the 0-15 cm depth are kept separate from samples taken at lower depths by placing them in a separate mixing container.
For all sampling guidelines, avoid sampling areas that would not be considered representative of an area. This includes:
- land immediately adjacent to drainage ditches
- highly eroded areas
- areas close to trees, roads, and fences
- current or previous manure piles
- fertilizer storage areas
- livestock excrement in grazed areas
- small areas of the field that are known to have distinctly different soils due to depth or texture
General
If nitrogen (N) is broadcast applied, take 15-20 soil samples at random locations throughout the field. If N is banded and the band location is known, take 15-20 samples at random locations throughout the field while avoiding the band. If the band location is unknown, take 30-40 samples at random locations throughout the field.
Small grains and canola
Take 15-20 soil samples taken at random locations throughout the field. If known, locations where fertilizer was applied at seeding or band applied should be avoided. If unknown, 30-40 samples should be taken.
Forages
Random samples should be taken from 15-20 locations throughout the field in areas that are representative of the overall sampling area.
Raspberries
Take 10-15 pairs of samples from locations (1) and (2) (Figure 2)
- The centre of the fertilizer band between the plants along the crop row
- The centre of the cultivation/root mound between plants in the crop row
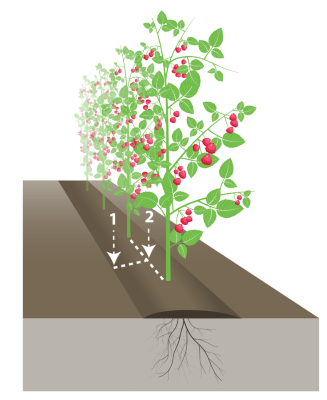

Figure 2. Sampling procedure for raspberries.
Blueberries
Take 10-15 pairs of samples from locations (1) and (2) (Figure 3)
- Base of raised bed between plants and inter-row
- Midway between plants in the row
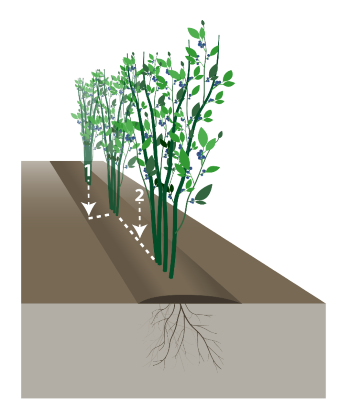
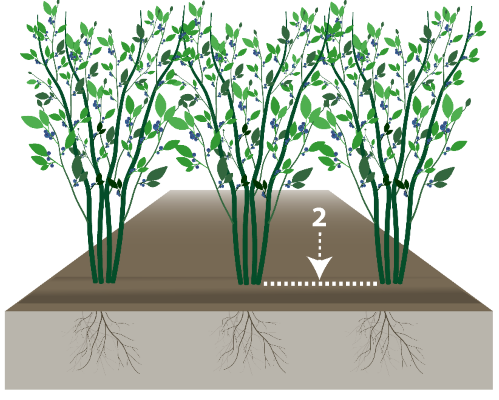
Figure 3. Sampling procedure for blueberries.
Tree Fruits, Grapes, and In-ground nursery stock
Take 15-20 samples at random locations throughout the field that are within the plant’s dripline. The area that is innermost one-third of the distance from the trunk to the dripline should not be sampled as little N application and uptake typically occurs in this zone.
More soil sampling topics:
