Insert images in CMS Lite
Guidelines for inserting and linking images in CMS Lite.
Overview
Images can enhance or distract from content.
If the image does not "tell a story", it is best practice not to include it.
Image size and placement
- Learn about Image sizing and placement in CMS Lite
Troubleshooting
If an image appears in QA environment, but does not show when the page is published, it is likely that the asset has been uploaded but not published.
You can check the history tab for the asset to confirm its status. If it has not been published, publish the asset.
Links
- Always test image links in QA to ensure they work as expected
- Links to applications or files, such as PDFs, should open in new browser tabs or windows
- Links to other web pages should open in the current window
Inserting images
Watch the video tutorial
Watch the video tutorial
Steps to insert an image
- Click on the Insert Image
 icon on the toolbar
The Image Picker will be displayed
- Click the [Image Picker] button. Note: if the asset does not already exist in the CMS Lite, see Upload Assets for more information
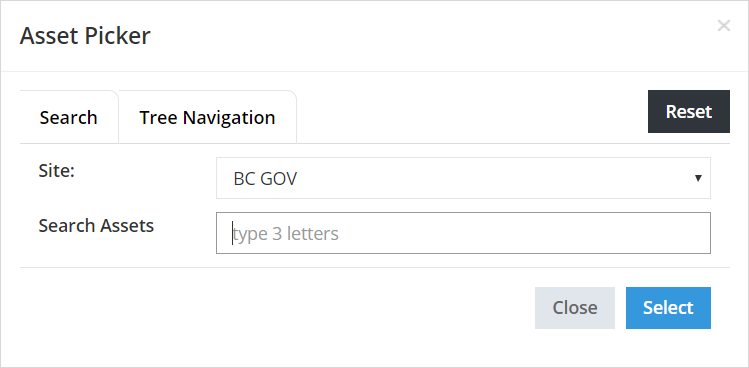
The Asset Picker will be displayed- Search or Navigate to the applicable image
- Click on applicable item to highlight it (in blue) and then click [Select] to complete the action
The Image Properties box will be re-displayed with the internal file path and ID of the asset.
- Mark as decorative: Select this if your image is meant for decoration only. Screen readers will ignore this image
- Alternative Text field: Mandatory field. Enter a meaningful description that will optimize search results, display on mouse-over in a web browser and be used by screen readers for the visually impaired
- Horizontal Space: Adds white space on either side of an image. Suggested value: 5 (pixels). Not applicable if alignment is set to Center
- Vertical Space: Adds white space above and below an image. Suggested value: 5 (pixels). Not applicable if alignment is set to Center
- Border: If using a border, keep in 'thin'. Suggested value: 1 (pixel)
- Alignment: if inserting an image that is going to expand the entire width of the content well, leave the default set to None. If using a smaller image width you have the option to wrap text around it by choosing Left or Right from the drop-down. Choosing Center will display the image in the centre but not wrap text around it
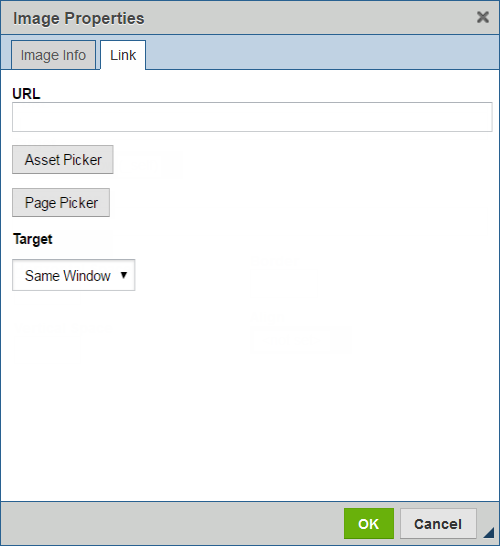
- Image Links tab: To create a link from the image, click on the tab
- Paste an external link in the Hyperlink Target field, or select the [Asset Picker] or [Page Picker] action button to choose an internal target
- If linking to a web page, leave the Target set to Current Window. If linking to a PDF you may set the Target to New Window as per the Web Standards
- Click the [OK] button to complete the action
The Image Picker will be closed and the image will be displayed at the cursor insertion point


